
Reservation System
Tables, floors, and complete reservation management
Use Reservations to review bookings and available actions for your restaurant.
Review draft: The image below is from a staging guide. The current US QA reservation view was not captured, and the steps and images still need product and privacy review.
Viewing Reservations
List View
Step 1: Click Reservations in the sidebar
Step 2: Review the reservations shown in the available view
Step 3: Each row displays:
- Guest name
- Party size
- Date and time
- Status
Filtering by Status
Choose an available view, such as Pending, Confirmed, or Waitlist, and use the search field to find a guest. Select a reservation to review its details when one is available.
Scroll across the image to see all four markers.
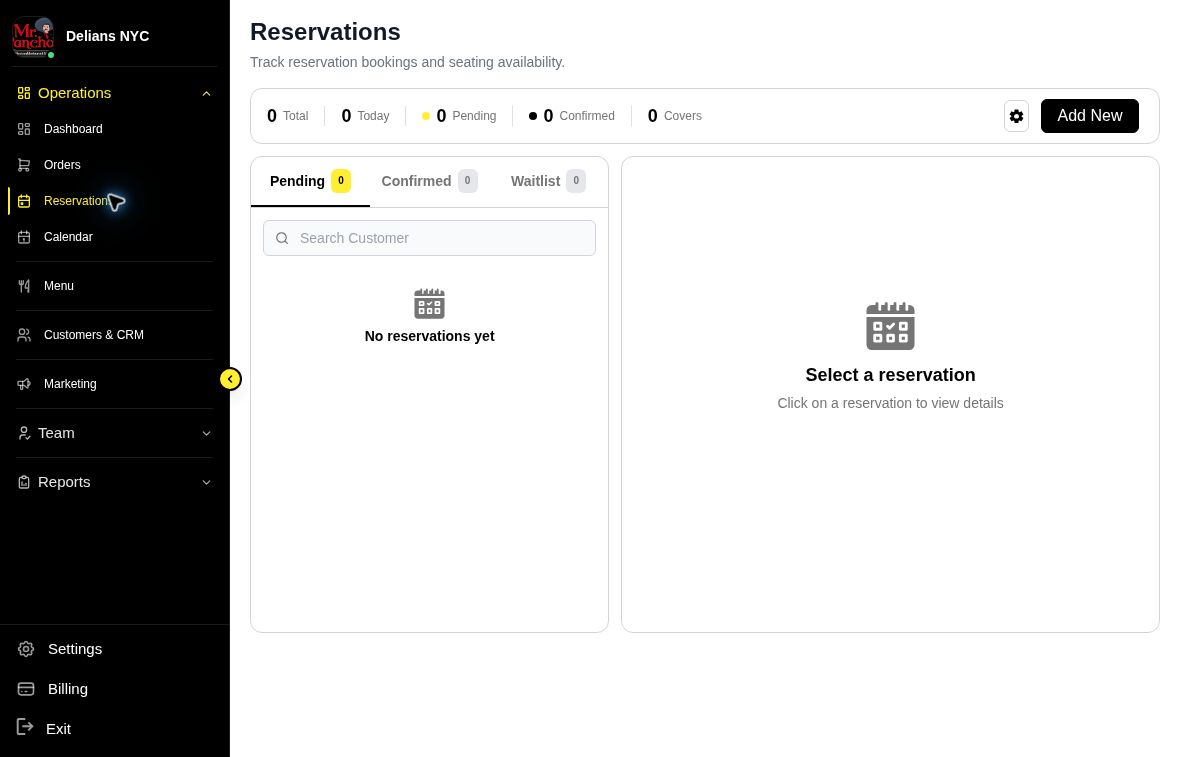
Staging example from October 12, 2026: no reservations are shown. Reservation actions were not tested.
- Reservations: Open Reservations from the sidebar.
- Views: Choose Pending, Confirmed, or Waitlist.
- Search: Use Search Customer to look for a guest.
- Add New: Open the form to add a reservation.
Calendar View
See reservations on a visual calendar:
Step 1: Click Calendar view option
Step 2: Navigate between days and weeks
Step 3: Click any reservation to view details
Step 4: Color coding shows reservation status
Creating a Reservation
For Walk-ins and Phone Bookings
Step 1: Click the Add New button
Step 2: Fill in the booking form:
- Guest name
- Phone number
- Email (optional)
- Party size
- Date
- Time slot
- Special requests
Step 3: Select a table (optional)
Step 4: Click Create Reservation
Step 5: Check the reservation status and follow your restaurant's procedure for confirming it with the guest.
Viewing Reservation Details
Step 1: Click on any reservation in the list
Step 2: The details panel opens showing:
- Full guest information
- Contact details
- Special requests
- Reservation history
Step 3: Take actions:
- Confirm or cancel
- Assign table
- Send message to guest
- Edit details
Managing Time Slots
Configure available booking times:
Step 1: Click Settings icon or go to reservation settings
Step 2: Set available time slots:
- Start time
- End time
- Slot duration
- Tables available per slot
Step 3: Configure capacity limits
Step 4: Click Save
Floor Plan Management
Visual table management:
Step 1: Navigate to Floor Plan section
Step 2: View your restaurant layout
Step 3: See table status:
- Green = Available
- Yellow = Reserved
- Red = Occupied
Step 4: Click tables to view assignments
Confirming a Reservation
Step 1: Find the pending reservation
Step 2: Click to open details
Step 3: Review guest information
Step 4: Click Confirm
Step 5: Check the resulting status and follow your restaurant's guest-notification procedure.
Seating a Guest
When guests arrive:
Step 1: Find their reservation
Step 2: Click Seat Guest or Mark Arrived
Step 3: Assign specific table if not already set
Step 4: Reservation status changes to Seated
Cancelling a Reservation
Step 1: Find the reservation
Step 2: Click to open details
Step 3: Click Cancel Reservation
Step 4: Select cancellation reason
Step 5: Choose whether to notify guest
Step 6: Confirm cancellation
Reservation Settings
Configure how reservations work:
Step 1: Go to Settings > Reservations
Step 2: Set preferences:
- Advance booking limit (how far ahead)
- Minimum party size
- Maximum party size
- Default reservation duration
- Auto-confirmation settings
Step 3: Configure notification templates
Step 4: Save settings
Online Booking Integration
Reservations sync from:
| Source | Description |
|---|---|
| Website | Your Fleksa website booking widget |
| Google Reserve | Google Search and Maps |
| Manual | Phone and walk-in bookings |
Best Practices
Managing bookings:
- Confirm pending reservations promptly
- Check for no-shows and update status
- Contact guests for large party confirmations
Capacity planning:
- Review upcoming bookings daily
- Block tables for private events
- Adjust availability for busy periods
Guest experience:
- Note special requests
- Track VIP guests
- Follow up after visits