
Orders
Create and manage delivery, pickup, and dine-in orders
Use the POS to work with dine-in, pickup, and delivery orders when those services are enabled for your restaurant.
Review draft: A blank customer-details form and an empty Delivery view were observed in US QA; the order workflows have not been fully verified on that build. Labels and actions can vary by device and restaurant configuration.
Start a dine-in order
- Open POS and select Dine In.
- Choose the room and table. Check whether the table opens an existing order before adding items.
- Add items and any requested options, then review the cart before proceeding.
See Table Management and Menu Access for more detail.
Customer details
If the customer-details form is available, enter the requested information and check the country prefix before entering a phone number. Review the details, then select Save. Ask your manager if you are unsure which prefix to use.
Scroll across the screenshot to see all four markers.
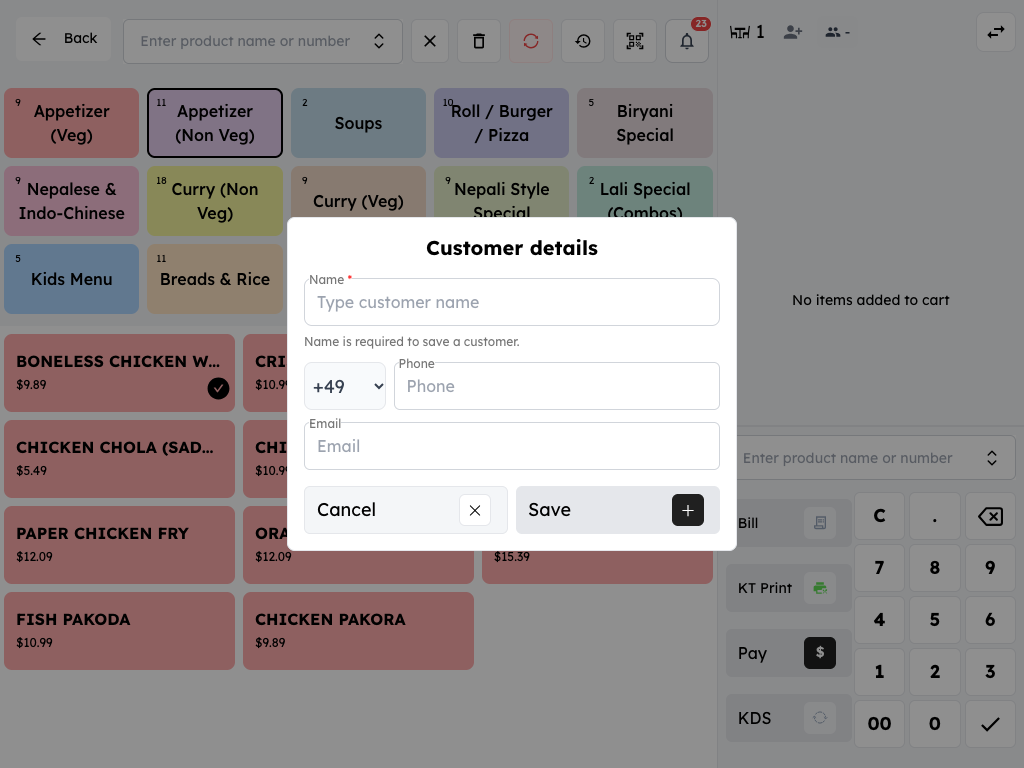
US QA review draft: a blank tablet form. Check the phone prefix for your customer.
- Name: The form marks the customer name as required.
- Phone prefix: Check and select the correct country prefix before entering a phone number.
- Email: Enter an email address when needed under your restaurant’s procedure.
- Save: Review the details and select Save.
Start a pickup or delivery order
- Open POS and choose Pickup or Delivery.
- Select New pickup order or New delivery order, and confirm if prompted.
- Add items and any required choices in the menu.
- Enter the customer, address, or timing information requested by the app. For delivery, check the address and any instructions carefully.
- Review the items, quantities, charges, and total, then follow your restaurant's procedure to proceed to payment or leave the order open.
Starting a new pickup or delivery order can create a pending order before payment. Check its status if you leave the flow; do not assume that an order was discarded simply because payment was not completed.
The example below shows where to start a delivery order.
Scroll across the screenshot to see all three markers.
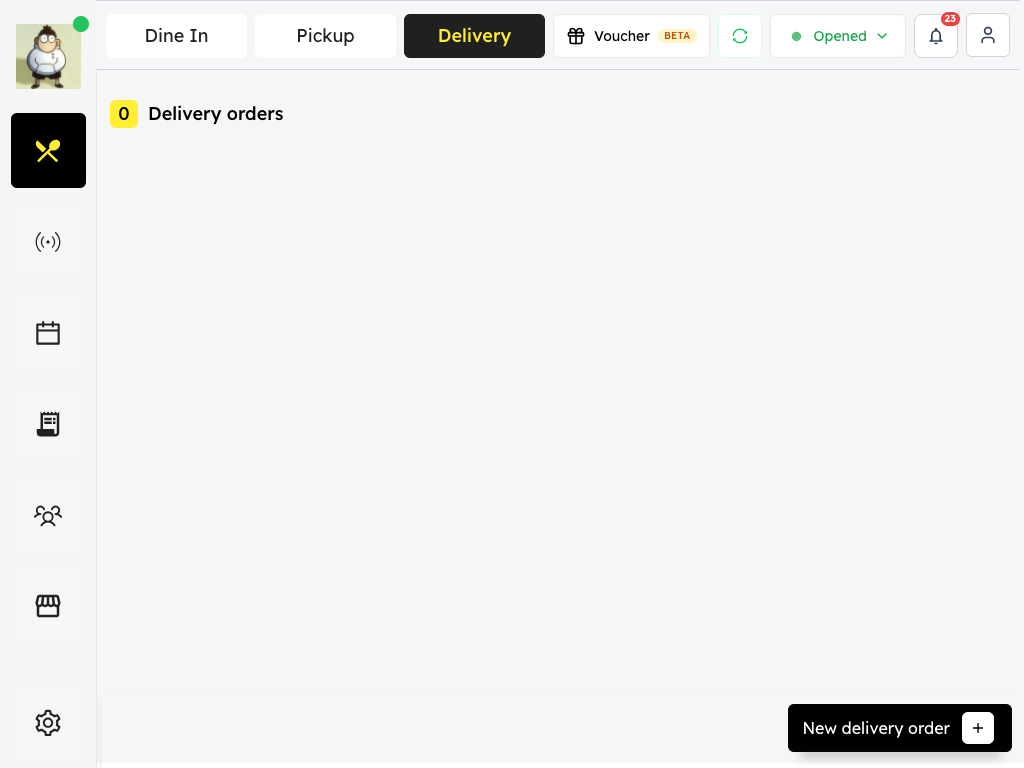
US QA review draft: Delivery view with no orders displayed.
- Delivery: Select Delivery when that service is available.
- Displayed orders: The count is zero in this view at the time of capture.
- New delivery order: Start a delivery order when needed; this action was not tested in this example.
Find an existing order
The Pickup and Delivery views can show running orders. Select an order to inspect its details and the actions available for its current state. An existing order may open checkout instead of an editable cart.
For a visual example of a pickup order in Live Orders, see Find an order. The status labels and actions can vary by order source. Check payment separately: an order's processing status alone does not prove payment was collected or that the guest received it.
Send to the kitchen and take payment
Kitchen display and printing depend on your restaurant's setup. If KT Print is available, use it according to your restaurant's procedure and check that the kitchen received the ticket. Do not assume that creating an order always prints a ticket automatically.
When ready to collect payment, follow Payment Processing. After selecting a payment method, check the amount due again before confirming; it can depend on the payment method and restaurant setup. Check the payment result and follow your restaurant's receipt procedure.