
Menu Access
Browse categories and products to create orders
The POS menu interface lets you quickly browse products, add items to orders, and manage the cart.
Review draft: One dine-in order was checked in a US test shop. Other workflows still need review. Your menu, prices, and controls may differ.
Adding Items to Cart
- Select a category, then tap an item.
- Review the item and choose any required options.
- Check the quantity and tap the displayed Add control.
- Check the cart to confirm the item and choices appear.
Adding the first item to a new dine-in table can create an order.
Menu screen: visual example
This US QA example shows a dine-in order after an item was added. Your restaurant's menu, prices, device, and layout may differ.
Scroll across the screenshot to see all four markers.
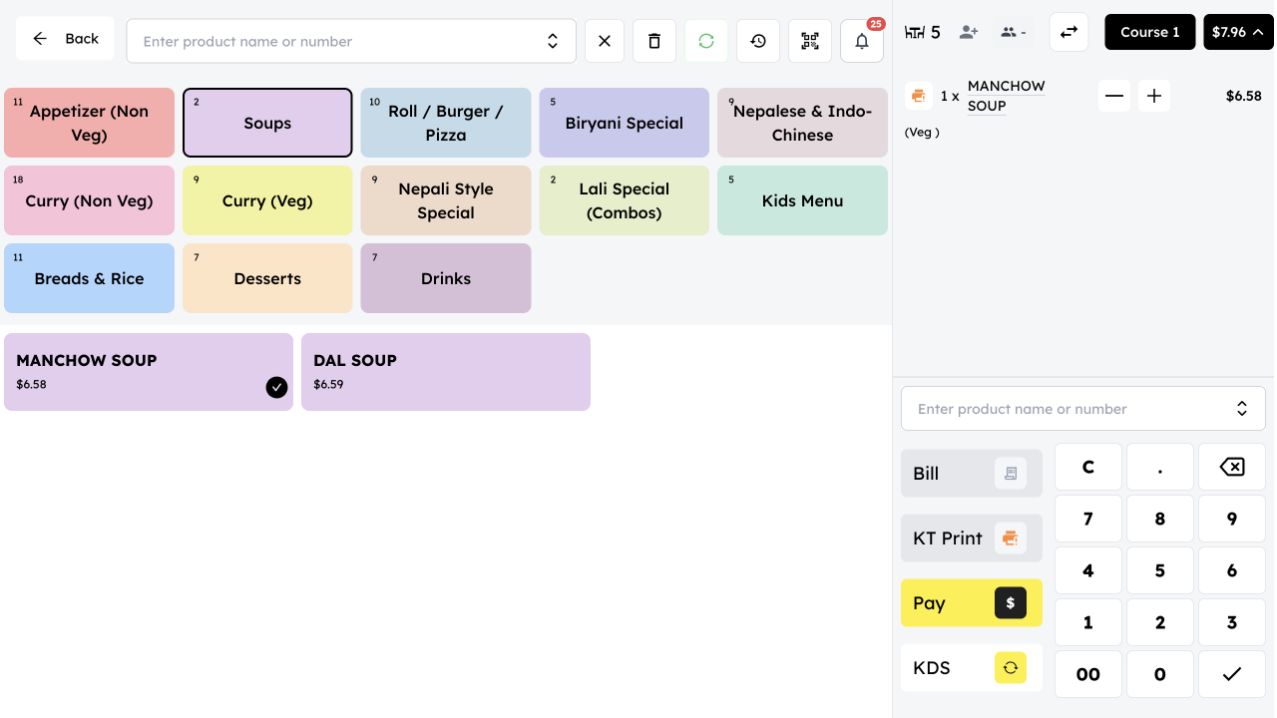
US QA review draft: a dine-in order with one item in the cart.
- Categories: Choose a category to browse its items.
- Items: Select an item to review it before adding it.
- Order summary: Review the selected item and quantity.
- Pay: Open the payment screen when the order is ready.
Empty cart example
This example shows the menu before an item is added. Your restaurant's menu and prices will differ.
Scroll across the screenshot to see all four markers.
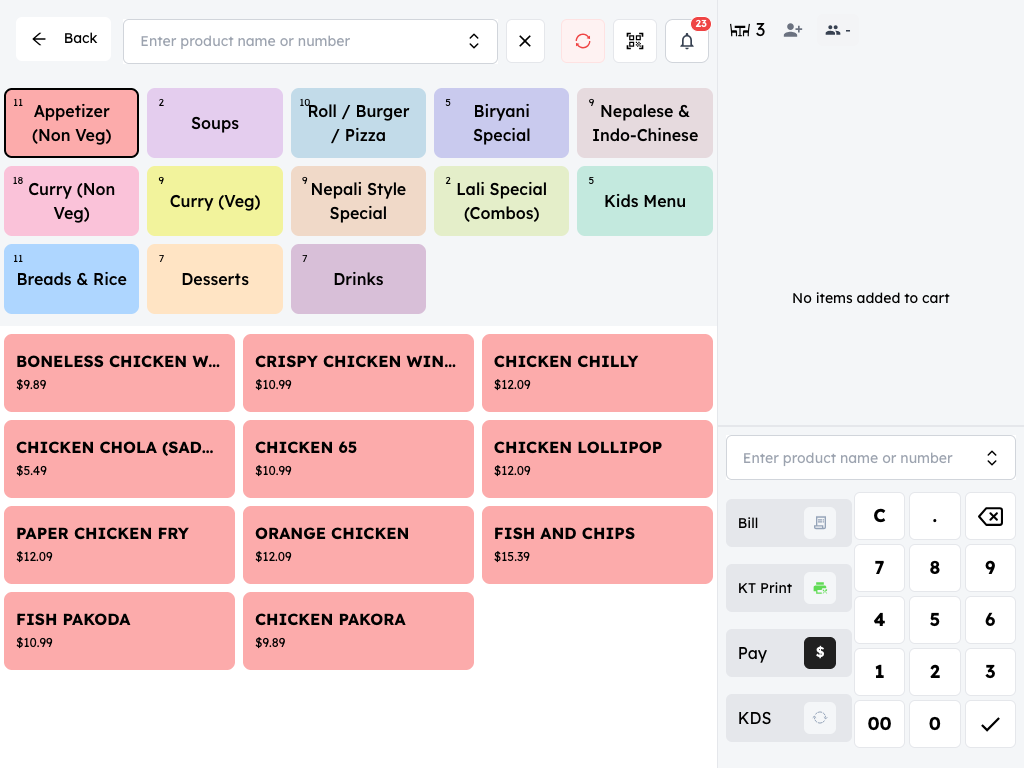
US QA review draft: empty cart before adding an item.
- Search: The search field is at the top of this example.
- Categories: The colored tiles group the available menu items.
- Products: Items in the selected category appear below the category tiles.
- Empty cart: The order area says no items have been added.
Menu Layout
On a wider screen, the menu is divided into three sections:
- Top Bar - Search, sync status, table info, and cart total
- Left Side - Category tiles and product grid
- Right Side - Cart summary and action buttons
Browsing Categories
Step 1: Categories appear as colored tiles at the top of the menu
Step 2: Each tile shows:
- Category name
- Number of products in that category
Step 3: Tap a category to see its products
Common categories include:
- Wraps, Pizza, Burgers
- Breakfast, Desserts
- Beverages, Specials
Viewing Products
After selecting a category:
Step 1: Products display in a grid below the categories
Step 2: Each product card shows:
- Product name
- Price
Step 3: Tap a product to review it before adding it to the order.
Viewing Cart
On a wider screen, your current order displays on the right:
- Product name with any selected options
- Quantity with controls for editable items
- Item price and total
Review the cart after adding or modifying items and check that the intended changes appear.
On the phone example below, View cart appears at the bottom. The cart is empty in this example.
Scroll across the screenshot to see the marker.
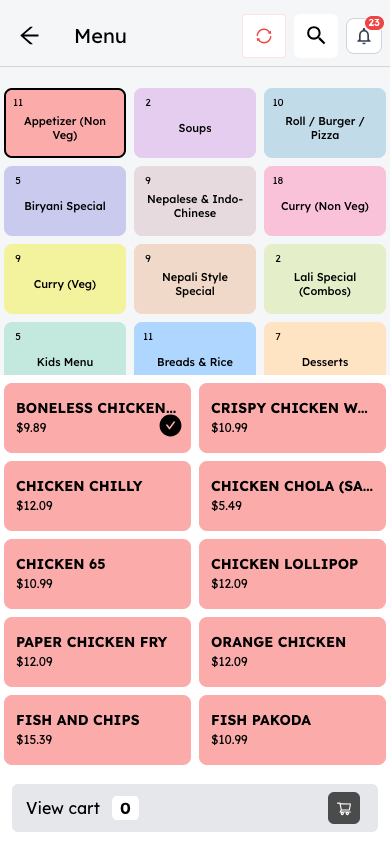
US QA review draft: phone menu before an item is added. Displayed prices have not been verified.
- View cart: The phone example shows View cart and a count of zero.
Quick Actions
Available quick actions depend on the device and configuration:
| Button | Function |
|---|---|
| Bill | Access the bill or receipt action |
| KT Print | Request a kitchen ticket |
| Pay | Proceed to payment |
| Home | Navigate away from the menu |
Depending on configuration, leaving the menu can also trigger a kitchen print for pending items. Check the intended printer for output before retrying rather than assuming that a ticket or receipt printed. See Printing.
Where available, the number pad can be used for product lookup; check the item before adding it.
Searching Products
Step 1: Open search and select the product name or number field. Its position varies by screen size.
Step 2: Type the product name or item number
Step 3: Check the matching suggestions shown by the app.
Step 4: Select a matching product; if the search panel requires it, press Enter. Review the item, complete any required choices, and use the displayed Add control.
In these examples, a product name brings up a matching suggestion on a tablet and in the phone's search panel. Selecting a suggestion was not tested.
Scroll across the screenshot to see all three markers.
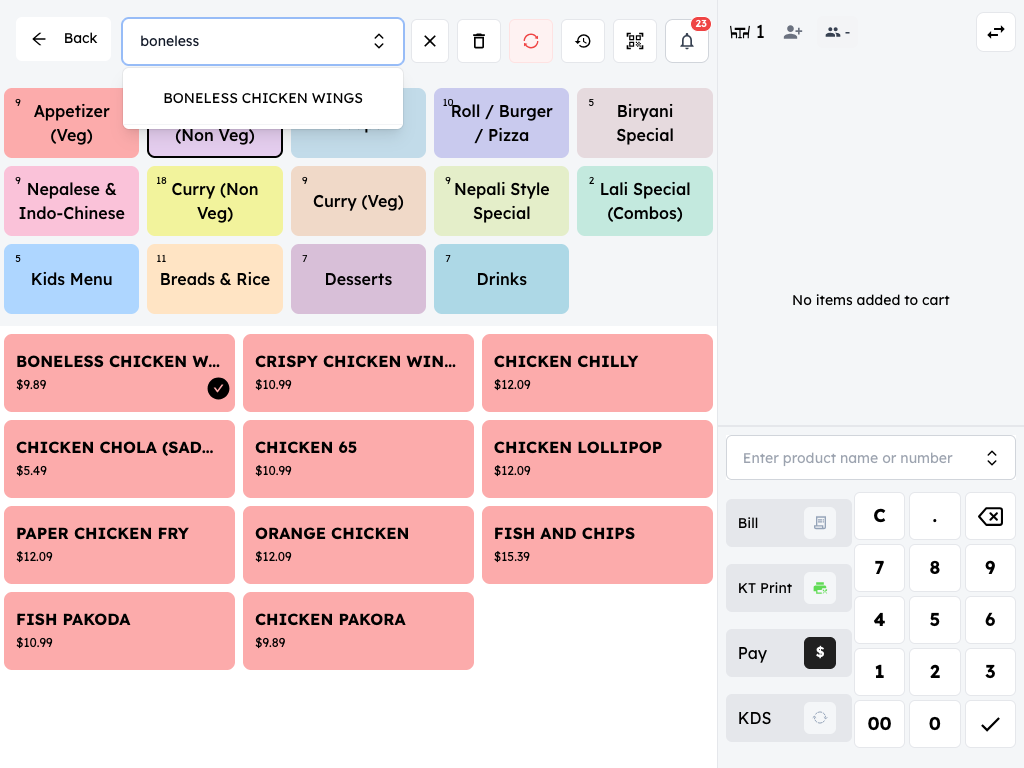
US QA review draft: product search on a tablet.
- Search field: Enter a product name or number.
- Suggestion: Select a matching product if it is the one you need.
- Cart: No items have been added in this example.
Scroll across the screenshot if needed to see all three markers.
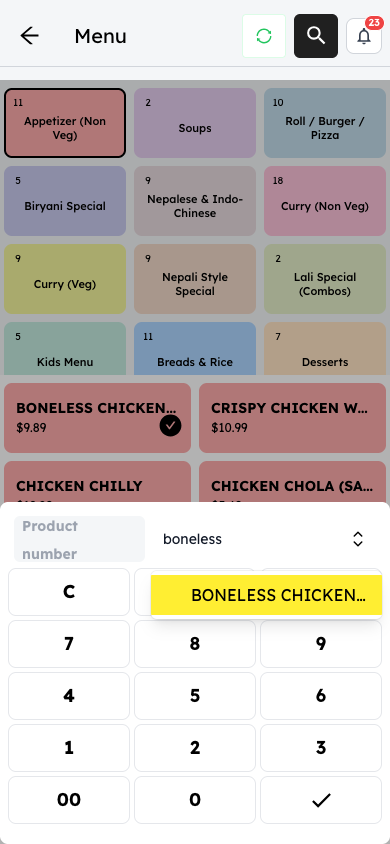
US QA review draft: the phone search panel, with a suggestion shown but not selected.
- Search field: Enter a product name or number.
- Suggestion: Check the matching product before selecting it.
- Confirm control: The panel shows a confirm key; its action was not tested in this example.
This is faster than browsing categories for repeat orders.
Modifying Cart Items
To change an item already in cart:
Step 1: For an editable item, use + to increase its quantity or − to request a reduction.
Step 2: Review the quantity and reason and confirm if prompted.
Paid items may need a separate refund process. Follow your restaurant's authorization procedure.
Product with Options
Some products require choices:
- Size - Small, Medium, Large
- Add-ons - Extra toppings, sides
- Choices - Preparation style, spice level
Select all required options before the item can be added.
This example shows an item's options before it is added to the order.
Scroll across the screenshot to see all four markers.
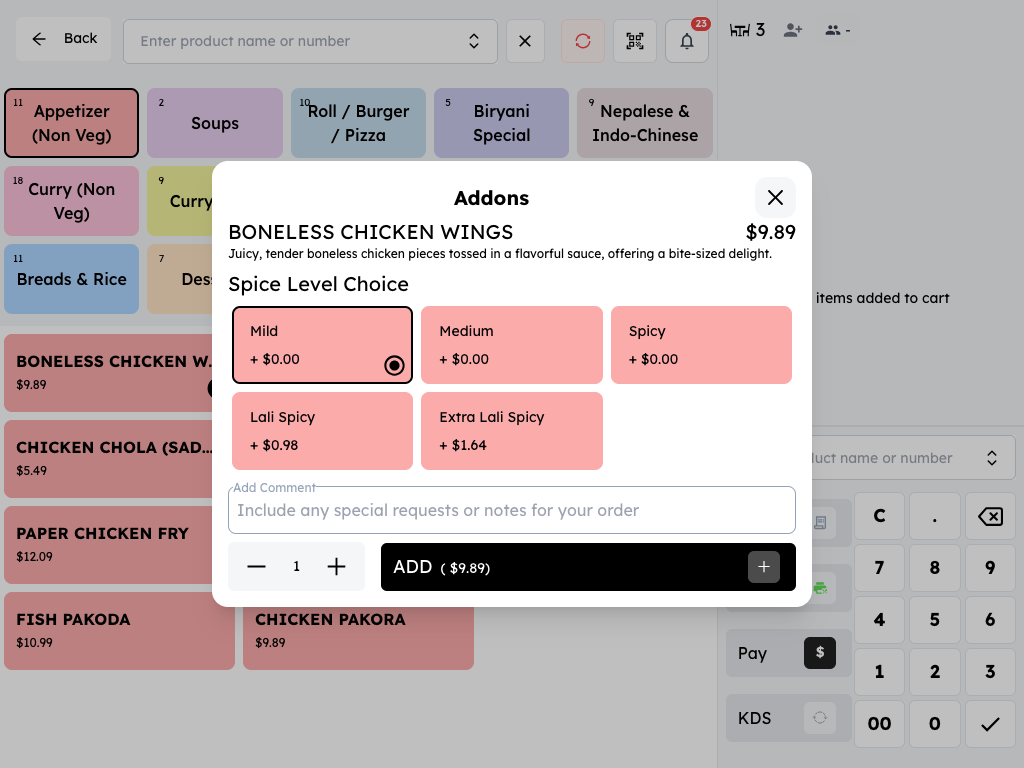
US QA review draft: item options before adding an item.
- Choices: Select the options requested by the guest and check any additional prices.
- Comment: Add a special request when the comment field is available.
- Quantity: Review the number of items before adding them.
- Add: Add the configured item to the order.
Review the order
Once items are added and you're ready:
- Review the cart summary and confirm the items and quantities.
- Follow your restaurant's workflow. Use KT Print for a kitchen ticket when available. When ready for checkout, select Pay.
Check the order status before leaving the screen. Printing a kitchen ticket does not by itself establish that the order was paid.
Tips for Fast Service
- Learn item numbers - Use the numpad for frequent items
- Use search - Faster than browsing for specific products
- Group by course - Add appetizers first, then mains
- Check the total - Verify before sending to kitchen